Sanding and Surface Prep Buying Guide for Painting, Patching, and Refinishing
Surface prep tools are easy to underestimate because they do not feel as visible or satisfying as paint, new trim, or a finished repair. But poor prep is what makes many projects look rushed even when the finish coat itself was applied carefully. The wrong sanding block can round over edges that should stay crisp. The wrong abrasive can clog too quickly, cut too slowly, or leave scratches that show through paint. A scraper that seems convenient can gouge drywall or soften wood details if it is too aggressive for the job. Good prep tools are not just about making surfaces smooth. They shape how predictable the whole project feels, from patching and repainting to stripping flaky edges and blending repairs into older finishes. This guide explains how to choose sanding and surface prep tools based on surface condition, repair stage, dust control, and working position so you can avoid the kind of problems that only become obvious once the finish is already on the wall.
Tool Format and Surface Access
The first decision in sanding and surface prep is not grit. It is tool format. Different prep tools solve different problems, and buying well starts with knowing whether the job is about flattening a patch, softening a rough edge, removing loose material, or reaching a large surface without exhausting yourself. A single all-purpose solution sounds efficient, but it usually creates compromise where control matters most.
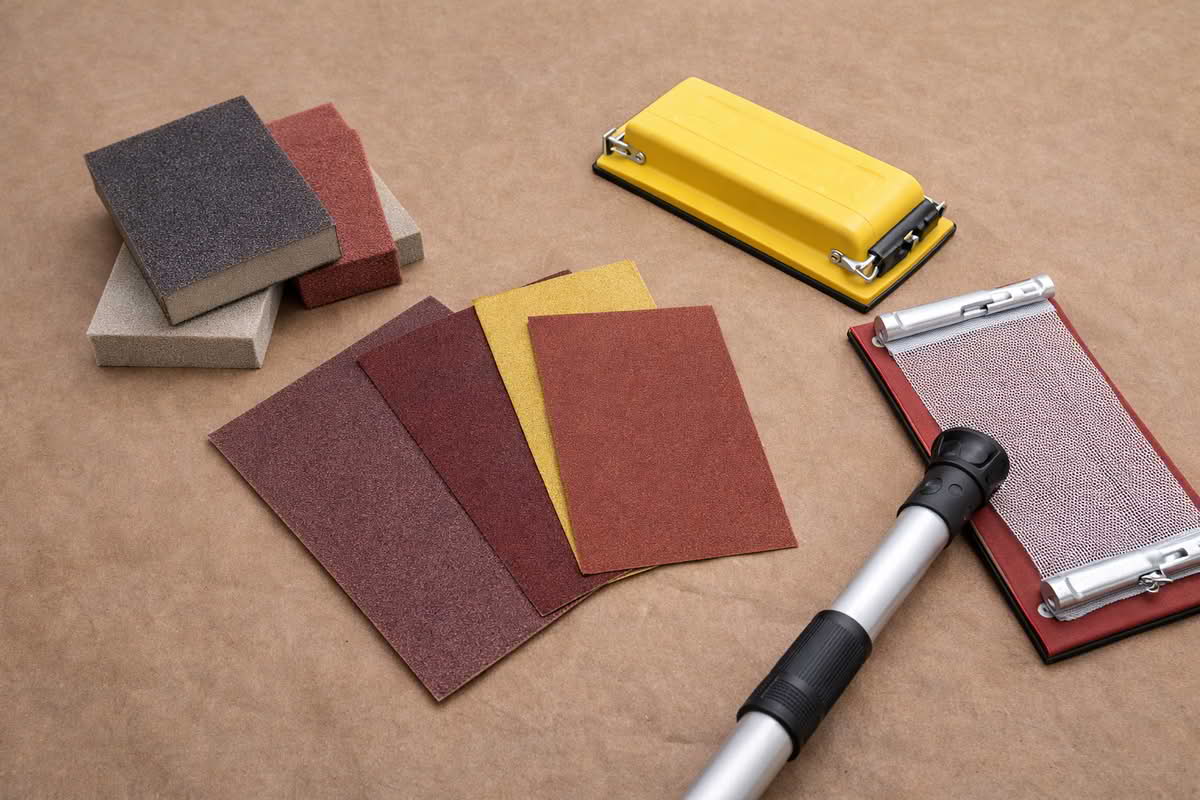
Hand sanding blocks remain the most predictable option for many DIY repairs because they keep pressure relatively even and make it easier to feel what the surface is doing. That matters on drywall patches, filler repairs, and painted wood where you want to remove high spots without digging new ones. A decent sanding block also reduces the tendency to pinch loose paper with your fingers, which often creates grooves, uneven pressure lines, and rounded edges that become visible under paint.
Sanding sponges are especially useful where flexibility matters. They conform better around trim profiles, corners, curved details, and small transitions between patched and original surfaces. They are not always the fastest cutting option, but they are often the safer option when the surface is not perfectly flat or when the goal is blending rather than aggressive removal. This is why they show up repeatedly in repainting, light refinishing, and trim prep. They are forgiving in a way rigid abrasives often are not.
Pole sanders serve a very different purpose. They are less about finesse and more about reach, consistency, and reduced ladder dependence on ceilings and tall walls. For broad drywall prep, feathering old paint edges high on walls, or lightly dulling glossy surfaces before repainting, a pole sander can make the job more manageable. The tradeoff is precision. Pole tools are harder to control around corners, repairs, and smaller defect zones. They can also tempt users to sand too broadly just because the tool reaches more area easily.
Scrapers belong in the same buying conversation because many surface prep problems begin before sanding. Peeling paint, flaking caulk residue, lifted patch edges, old adhesive, and crusted filler often need removal before abrasives can do their job efficiently. But scraper choice should be proportional. A rigid heavy-duty scraper can remove stubborn material faster, yet it also increases the chance of gouging softer wood, drywall paper, or underlying surfaces that were already only marginally sound. Lighter scraper kits or narrower blades often work better for controlled removal, especially indoors where damage repair costs more time than careful scraping would have.
Choose sanding blocks for flat repair work where even pressure matters.
Choose sanding sponges for trim, contours, corners, and blended transitions.
Choose pole sanders for ceilings and higher wall sections where reach and consistency matter more than fine detail.
Choose scraper tools based on the risk of damage below the material you are removing.
One of the most common buying mistakes in this category is choosing tools based on intensity rather than control. People assume a more aggressive format will make the project shorter, but many prep jobs are really about removing only what should be removed. Over-sanding a patch, over-scraping a painted edge, or flattening texture beyond the repair zone often creates more cosmetic inconsistency rather than less. In visible rooms, subtle damage from an overaggressive prep tool can remain noticeable even after repainting.
Access also includes body position. Working overhead, along baseboards, inside corners, around door casings, or on cabinet faces changes which tool format feels sensible. A tool that cuts quickly on a bench-top project may become clumsy when used on a ladder or in a narrow hallway. A better buying question is often: how will I actually hold and move this tool for twenty minutes, not just how fast does it remove material in theory?
Abrasive Choice and Cutting Behavior
Once the tool format is right, abrasive behavior becomes the next major decision. This is where many surface prep problems begin because people tend to think only in terms of coarse versus fine. In practice, the real issue is how aggressively the abrasive cuts, how quickly it clogs, and how much surface refinement the next stage of the project requires.
Coarser abrasives remove material faster, which sounds helpful until you remember that many DIY prep tasks involve finished surfaces that need restraint rather than speed. On patching compound, soft filler, or thick old paint edges, an abrasive that cuts too quickly can dig shallow channels, flatten surrounding texture too aggressively, or create visible scratch patterns that later telegraph through primer and paint. Coarser options have a place, especially when there is real buildup, flaking, or heavy unevenness, but they should be treated as a correction stage rather than a default.
Medium and finer abrasive ranges are often more useful for household painting and repair because they support control and transition work. They let you feather the edges of a repair, reduce glossy sheen, and smooth compound without racing past the point where the surface was already good enough. For many rooms, the goal is not perfectly bare material. It is a stable, visually blended surface that will accept the next coating evenly.
Abrasive material and backing matter too. Some sanding products resist clogging better and maintain more consistent cutting over longer sessions. Others load up quickly with paint dust, drywall compound, or filler and then stop working well while still looking usable. This matters because clogged abrasives do not simply slow the job. They often create inconsistent pressure and encourage harder rubbing, which can polish some spots while scratching others. A prep tool that cuts predictably is easier to trust and easier to stop using at the right moment.
This category also reveals a common misunderstanding about refinishing versus repainting. If you are repainting a surface that is mostly sound, the abrasive does not need to behave like a stripping tool. It needs to dull, smooth, and blend. If you are dealing with damaged coatings, failing edges, or rough filler buildup, then more aggressive cutting may be justified for the first stage. Buyers who collapse those two situations into one usually buy a tool that is either too weak for correction work or too harsh for finish prep.
The best abrasive choice depends on whether the job is removing buildup, blending repairs, or lightly preparing a sound surface for the next finish layer.
Another useful way to think about abrasives is by failure risk. If sanding too little leaves a minor rough area that primer can still help unify, that is usually easier to correct than sanding too deeply into drywall paper, veneer, detailed trim, or surrounding texture. This is why cautious progression often produces better-looking results than starting aggressively and trying to recover later.
Use coarser abrasives as a correction step when there is real buildup or unevenness to remove.
Use medium or finer abrasives for smoothing, blending, and finish prep on sound surfaces.
Replace clogged abrasives sooner than you think rather than forcing inconsistent cutting.
Match abrasive behavior to the stage of the project: correction, feathering, or final prep.
Long-term cost also deserves some attention. Bargain abrasive packs can look efficient, but they often wear unevenly, shed backing, or cut inconsistently across the project. Higher-quality abrasives usually pay off less through dramatic speed gains and more through stability. They reduce the number of moments where you stop and wonder whether the tool or the surface is the problem.
For most DIY users, that predictability matters more than maximum cutting power. A consistent abrasive lets you work deliberately, especially on visible walls and trim where subtle prep errors matter more than raw removal speed.
Dust, Fatigue, and Project Workflow
Sanding and prep tools should also be judged by what they do to the project environment. Dust, fatigue, and sequencing often determine whether a prep system feels practical or exhausting. This is especially true indoors, where cleanup quality affects not only the finished surface but also the livability of the surrounding space.
Dust control matters because surface prep usually happens right before the stage where cleanliness becomes more important, not less. Sanding dust left on trim, walls, floors, or adjacent rooms interferes with primer and paint adhesion, settles into finish coats, and increases cleanup at the worst possible moment. A prep system that creates manageable dust or contains it better can improve the whole project even if it is not the fastest material remover.
Hand tools can actually be an advantage here. They often produce slower, more localized dust that is easier to control than broad aggressive sanding over large areas. Pole sanding covers more ground, but it also spreads fine dust farther and higher. That does not make it a bad choice. It simply means it works best when paired with a room setup that expects the cleanup burden. In occupied spaces or quick repair jobs, a smaller hand-prep approach may create less total disruption.
Fatigue is another overlooked issue. Surface prep often seems easy for the first several minutes, then steadily becomes less precise as your arms, shoulders, wrists, or grip begin to tire. This is where handle design, tool balance, and reach matter in ways product packaging rarely explains. A sanding block that is only slightly uncomfortable can encourage rushed technique by the end of a room. A pole sander that reduces ladder work may improve both speed and consistency simply because your body position remains more stable.
Workflow matters just as much as the individual tool. Many projects are not a single sanding task. They are a sequence that includes scraping loose material, patching, letting repairs set, leveling the patch, checking edges under light, wiping dust, and then deciding whether a second prep pass is needed. A good prep kit supports that sequence. It does not force one tool to do every job. Buyers often feel more satisfied when they own a small set of complementary prep tools rather than one overly specialized item that still leaves obvious gaps.
Cleanup and storage are part of the same decision. Sanding sponges and hand blocks are easy to keep organized and easy to reach for during small repairs. Larger tools such as pole sanders are more valuable when the project volume repeatedly justifies their footprint. The best buying choice depends partly on whether you expect recurring room repainting, patching, and maintenance, or whether you only need a few controlled tools for occasional household fixes.
Prefer lower-disruption prep tools when working in occupied rooms or on smaller repairs.
Use longer-reach tools when they reduce ladder dependence and improve overhead consistency.
Build a prep workflow around scraping, smoothing, dust removal, and final inspection rather than one single sanding pass.
Choose tools you will store accessibly and use repeatedly, not just tools that seem powerful for one project.
One helpful decision frame is to ask whether the job is limited by reach, finish sensitivity, or defect severity. Reach-limited work favors pole tools. Finish-sensitive work favors more controlled hand formats and gentler abrasives. Defect-severity work may require scraper support and a more deliberate progression from aggressive correction to softer finish prep. Once you know the real constraint, the buying decision becomes much easier.
In long-term ownership, the best surface prep tools are the ones that make you more willing to prep correctly. If a tool is awkward, dusty, tiring, or hard to stage, people tend to skip steps and hope paint will hide the result. It rarely does. Good prep tools reduce that temptation by making careful work more manageable.
Final Recommendations — choosing prep tools that improve the finish instead of complicating it
For most households, the safest sanding and surface prep setup is a small, well-matched kit rather than one aggressive all-purpose tool. A hand sanding block handles many flat repair tasks well, sanding sponges cover trim and blended transitions, and a pole sander becomes worthwhile when ceilings or tall walls are part of regular repainting. Scrapers should be chosen for control, not just force, and abrasives should match whether the surface needs correction, smoothing, or final finish prep.
Start with controlled hand-prep tools unless the project clearly demands more reach or material removal.
Match abrasive aggressiveness to the repair stage instead of treating every surface like a stripping job.
Use pole sanders when they reduce fatigue and ladder work, not just because they cover more area.
Prioritize dust control, finish sensitivity, and repeatable results over maximum cutting speed.
The long-term low-regret approach in this category is to buy tools that support better judgment. Good surface prep is not about making every wall perfectly raw or every repair perfectly invisible in one pass. It is about removing the right material, protecting the surrounding surface, and creating a clean foundation for the next stage. When your prep tools make that easier, the finished room looks more deliberate and the entire project becomes more predictable.